I've had several people ask me about masking and how I do it with my subjects, which frequently have fur and feathers. I've created this quick tutorial to attempt to show you how to do the masking in Photoshop. Be advised, however, I don't use Photoshop for my work...that being said, I will try to explain things the best way I can! I have the Photoshop CS5 software, but I'm sure the below instructions would be similar in the newer versions. I purchased and use the entire suite of Topaz Labs software, and I do my masking in that software nowadays...I just find it very easy to use for masking as well as for doing many other things I do with my photography and texture work. I also use a Wacom Tablet, which gives me more precise control than a mouse would.
To start with, I think some people are having the same problems I had when I first began -- which is trying to mask around every stray hair on animal or feather on a bird. If I *must* do that, I use Topaz Remask (part of the Topaz software suite), but I rarely do that. It took me a while to figure out, the only one demanding perfection was myself. Rarely will it be noticed by the viewer, as most often, they don't see the original photo to begin with.
I often integrate my texture in with my subject as a background. I want the texture to be the background of the subject, as well as become part of the subject in a painterly fashion. I guess you can say I paint the texture out where I don't want it, and in where I do want it, using masking as a way to achieve that.
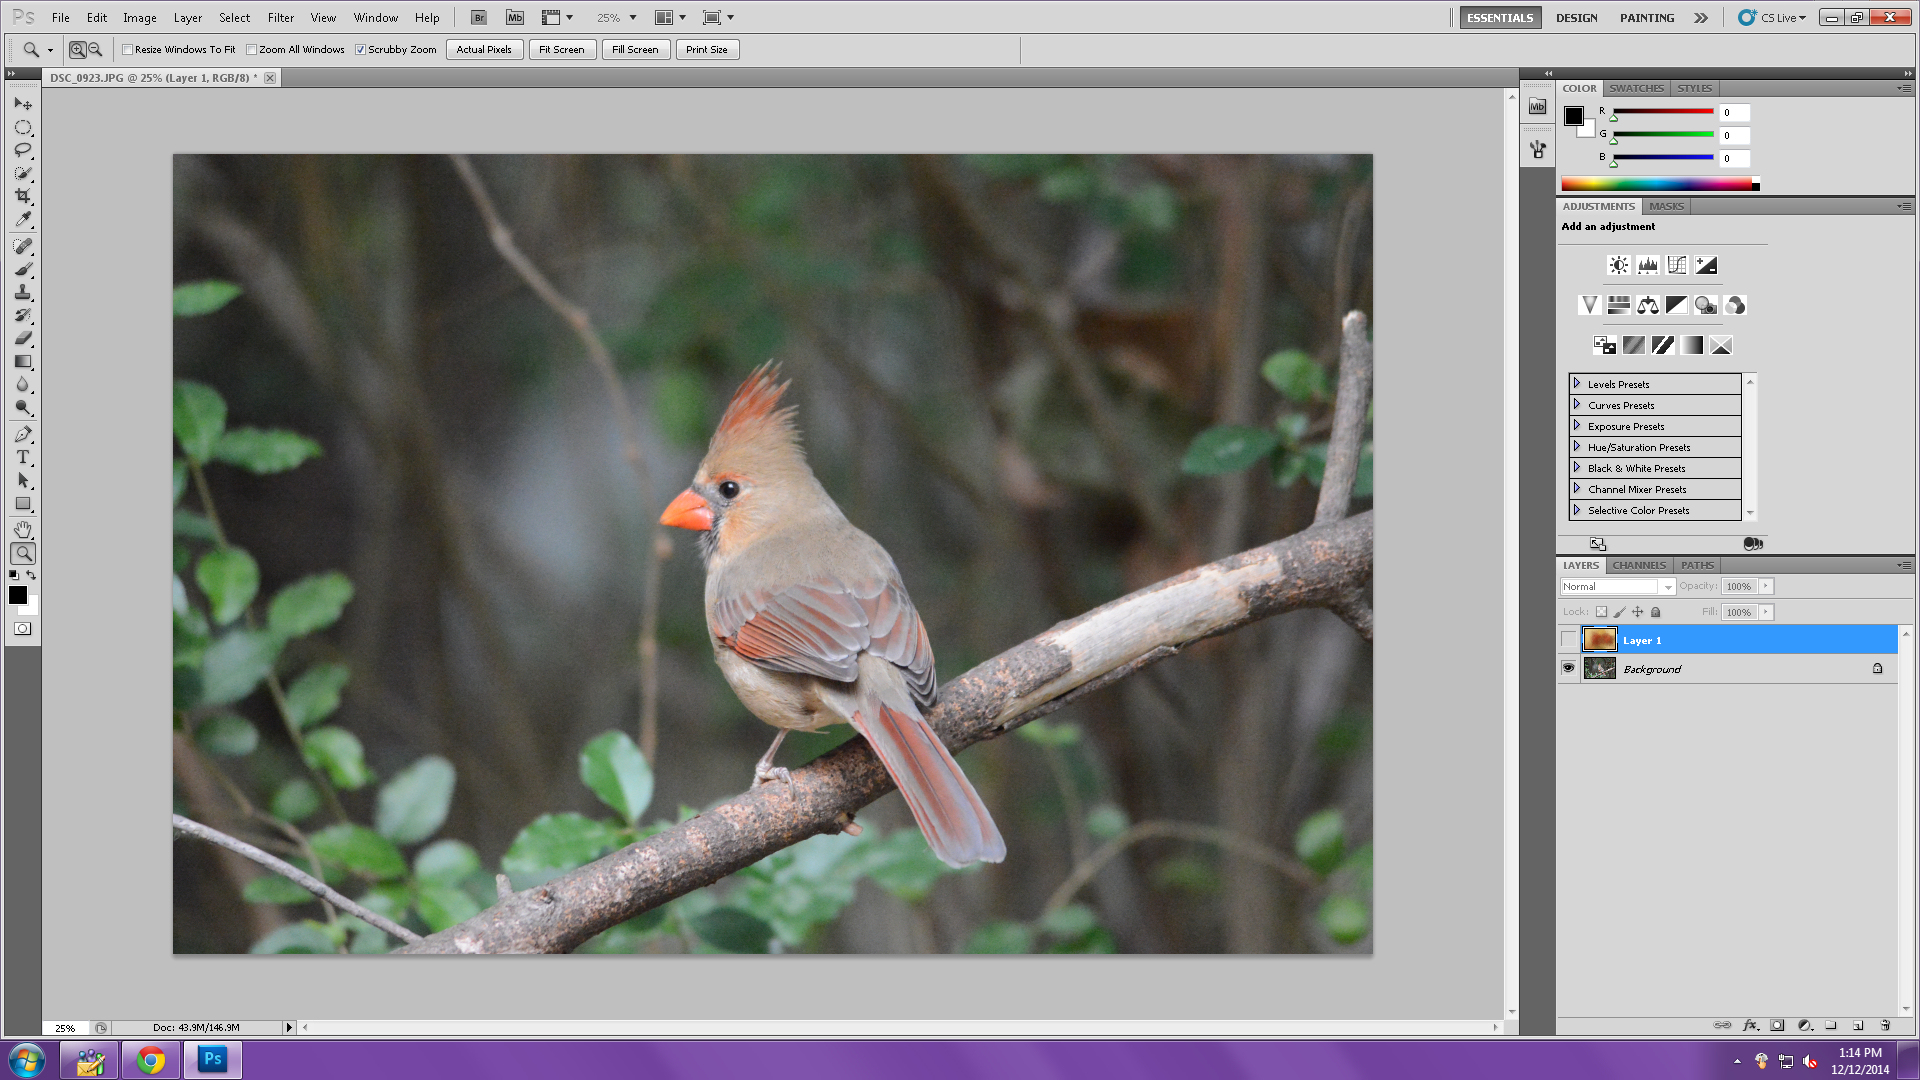
For this quick tutorial, I've chosen an image of a cardinal I just happened to have handy, and I used the Daily Texture which I'll be releasing tomorrow (Apple Juice). You can click on the images below to see a full size version.
So let's get started! This is the image I'll be using:
To start with, I think some people are having the same problems I had when I first began -- which is trying to mask around every stray hair on animal or feather on a bird. If I *must* do that, I use Topaz Remask (part of the Topaz software suite), but I rarely do that. It took me a while to figure out, the only one demanding perfection was myself. Rarely will it be noticed by the viewer, as most often, they don't see the original photo to begin with.
I often integrate my texture in with my subject as a background. I want the texture to be the background of the subject, as well as become part of the subject in a painterly fashion. I guess you can say I paint the texture out where I don't want it, and in where I do want it, using masking as a way to achieve that.
For this quick tutorial, I've chosen an image of a cardinal I just happened to have handy, and I used the Daily Texture which I'll be releasing tomorrow (Apple Juice). You can click on the images below to see a full size version.
So let's get started! This is the image I'll be using:
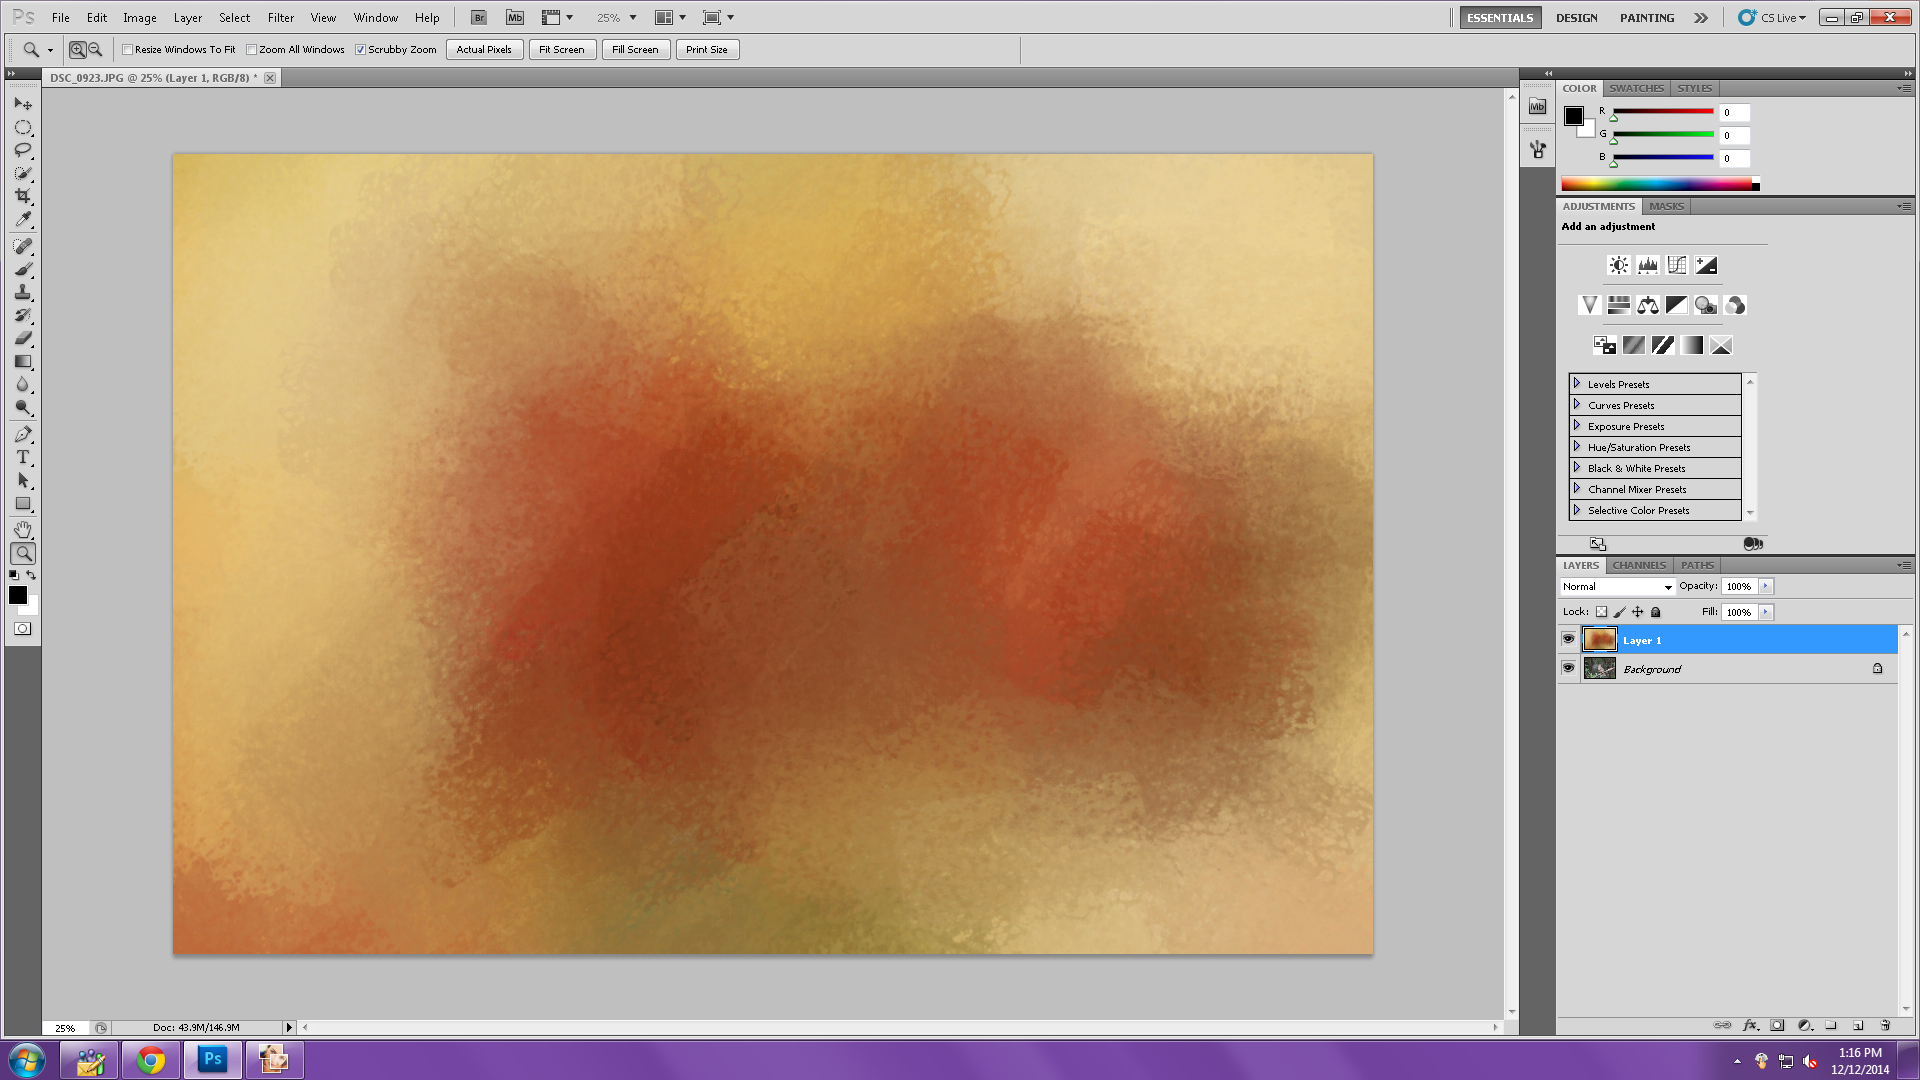
Here I've placed texture as a new layer on top of the cardinal.
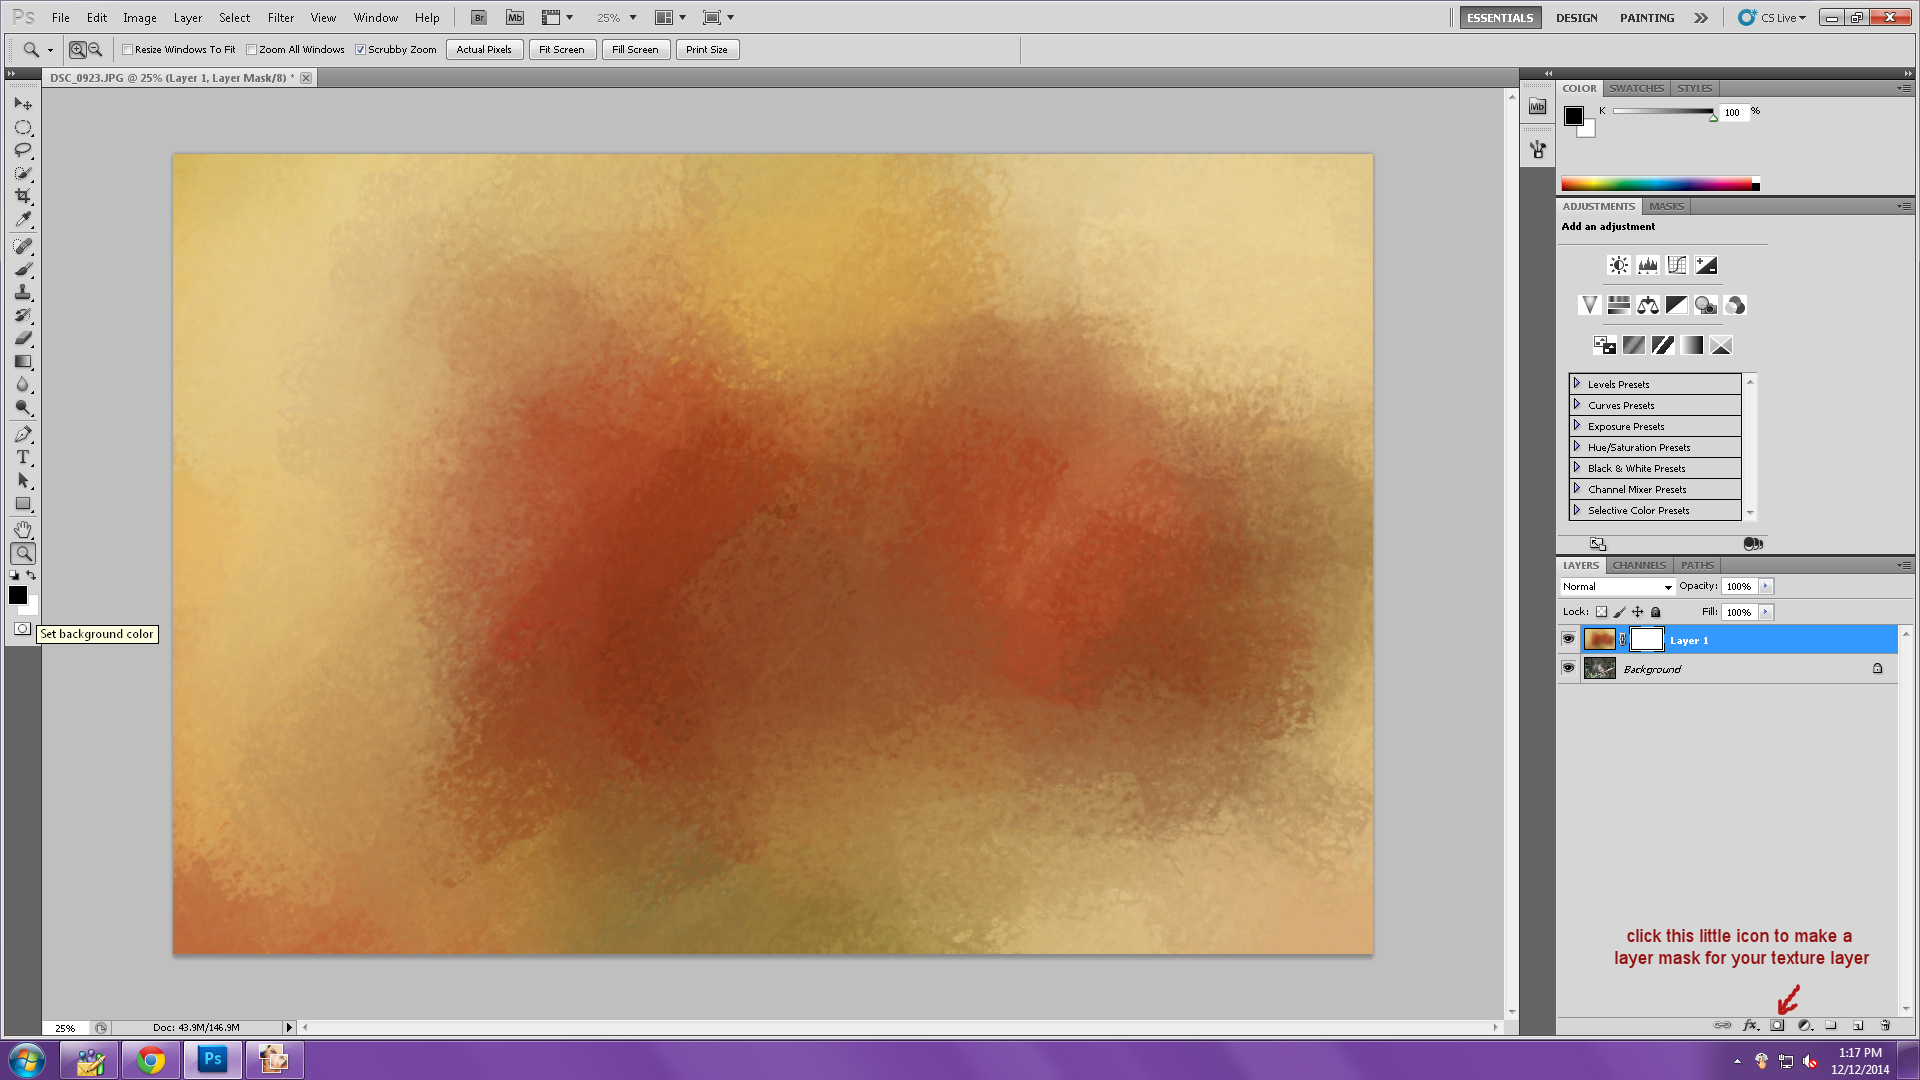
Below, I've added a layer mask to the texture layer. There's a small icon at the bottom of the layers panel...click that little icon and you will see a white layer box appear to the right of your texture in the panel.
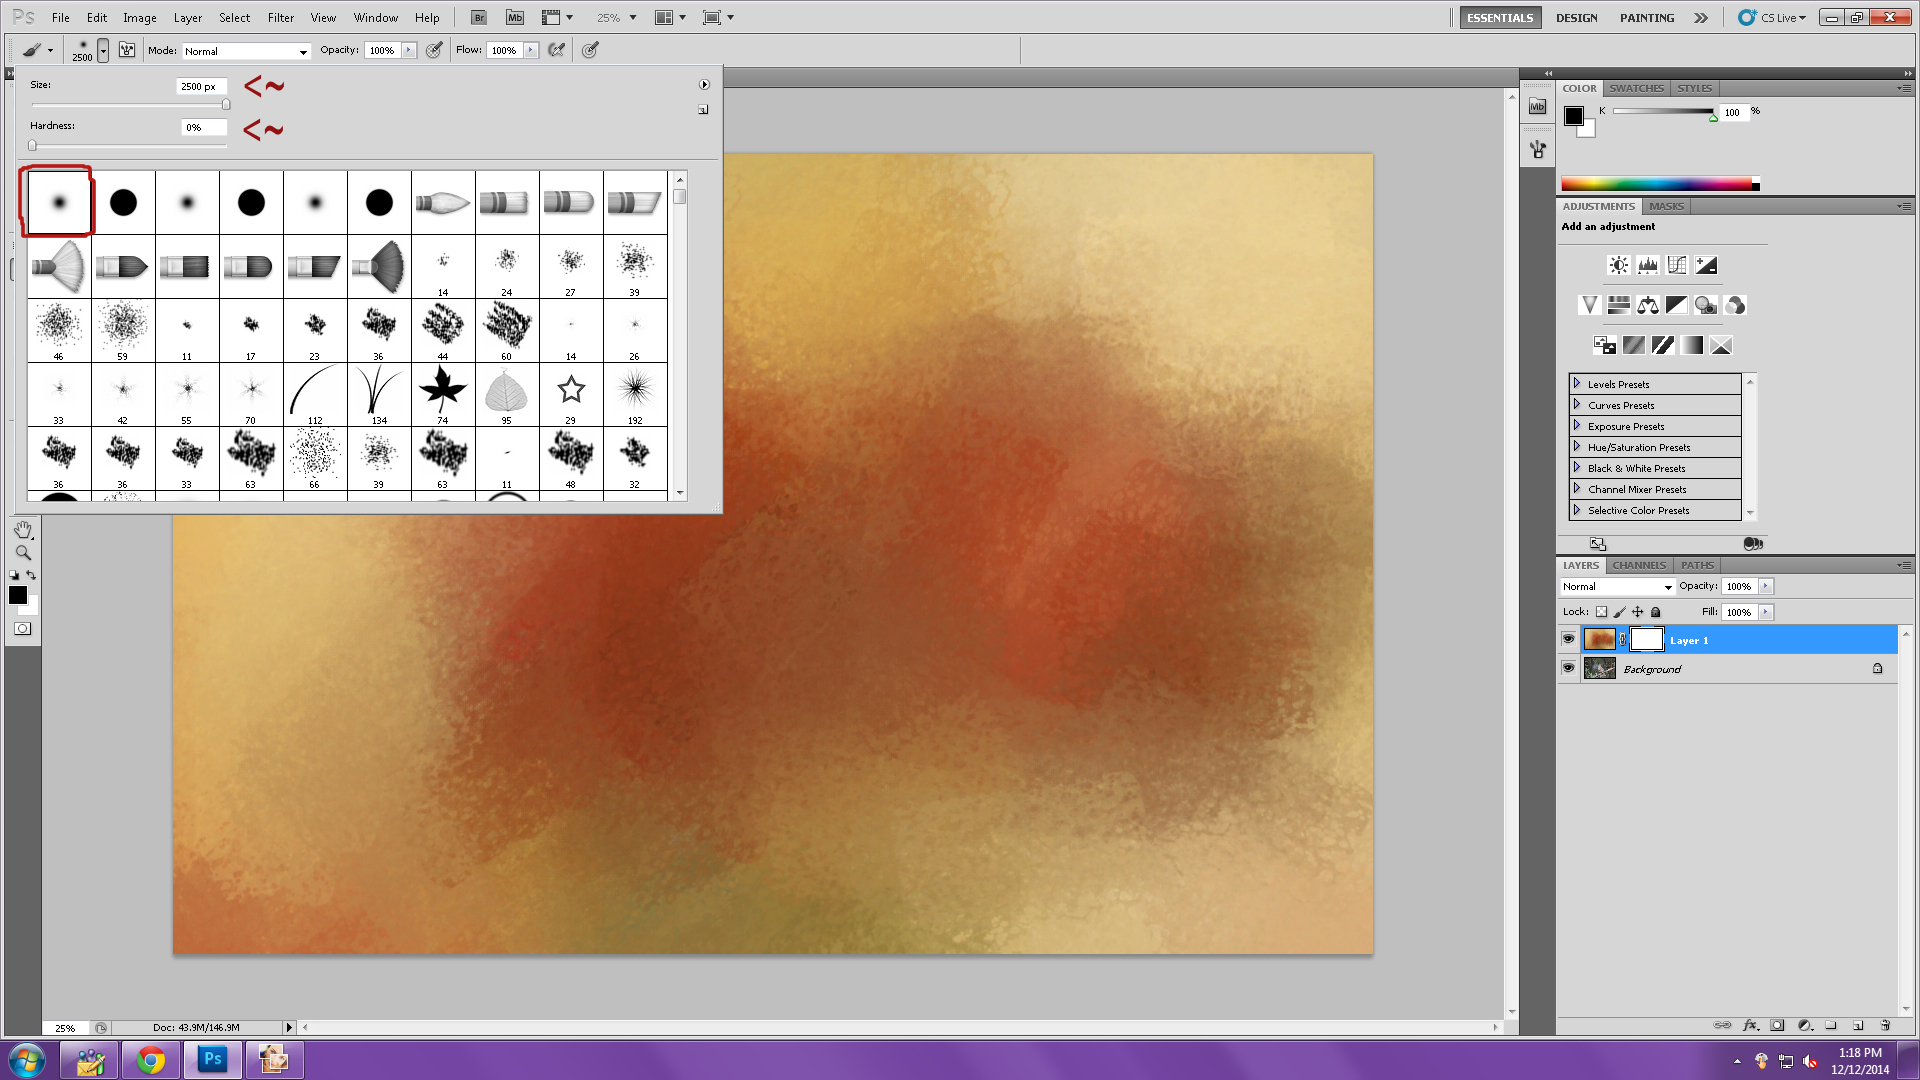
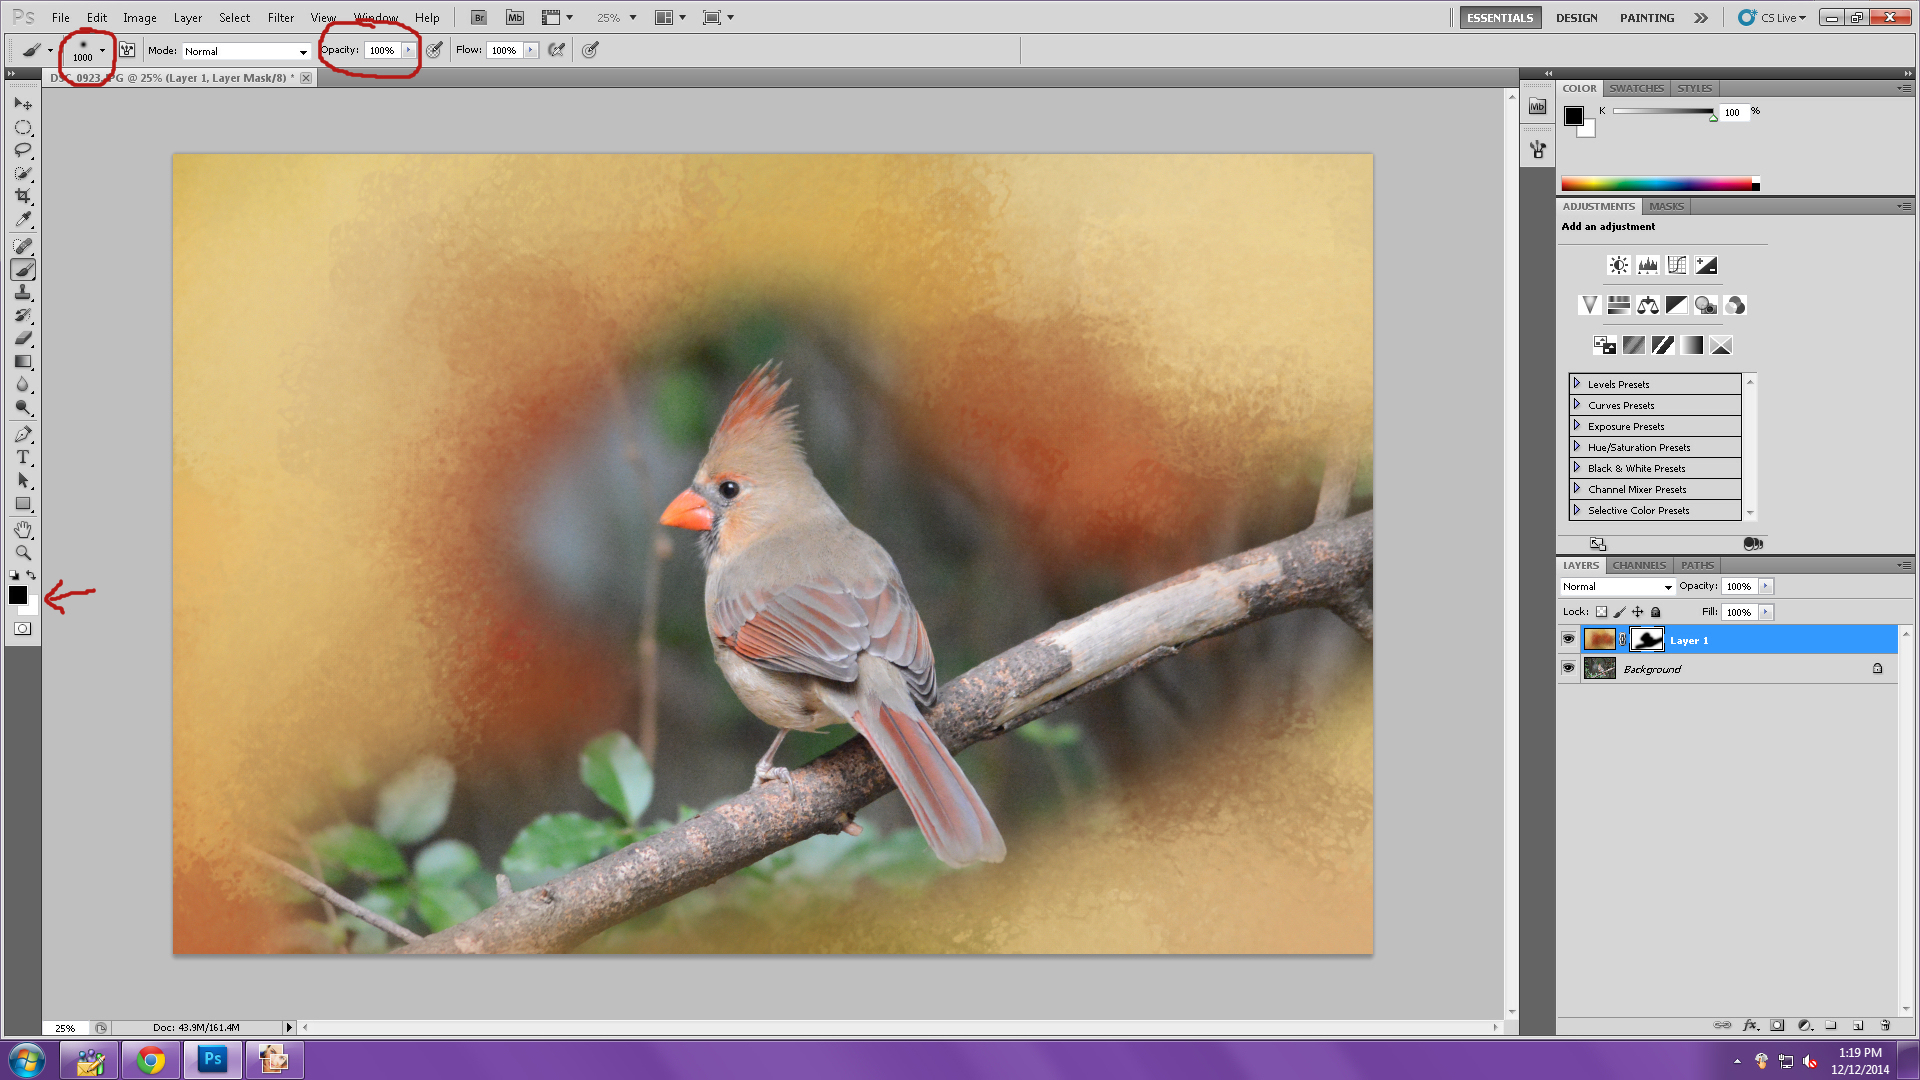
Now it's time to select your brush. I choose the basic brush which I've marked in red...1st one in the panel. I've started the size off at the largest size available, but look at HARDNESS. I recommend that number be 0. The only time I might choose a harder brush is if I happen to be masking along the edge of a straight line, such as a building, when I need to be precise. For birds, animals, flowers and most objects with any kind of curve to them, I always use a hardness of 0 to keep things soft.
Now it's time to paint some of the texture away. I start painting in the general vicinity where I know the subject is in the frame. It doesn't matter if I paint away too much, because I'm going to be painting it right back in! I lowered my brush size using my bracket keys. I left the brush opacity at 100% for now (that will change later). And you have to make sure your foreground paint color is BLACK and background is WHITE. Black will remove the texture. Switching to white in the foreground will put it back.
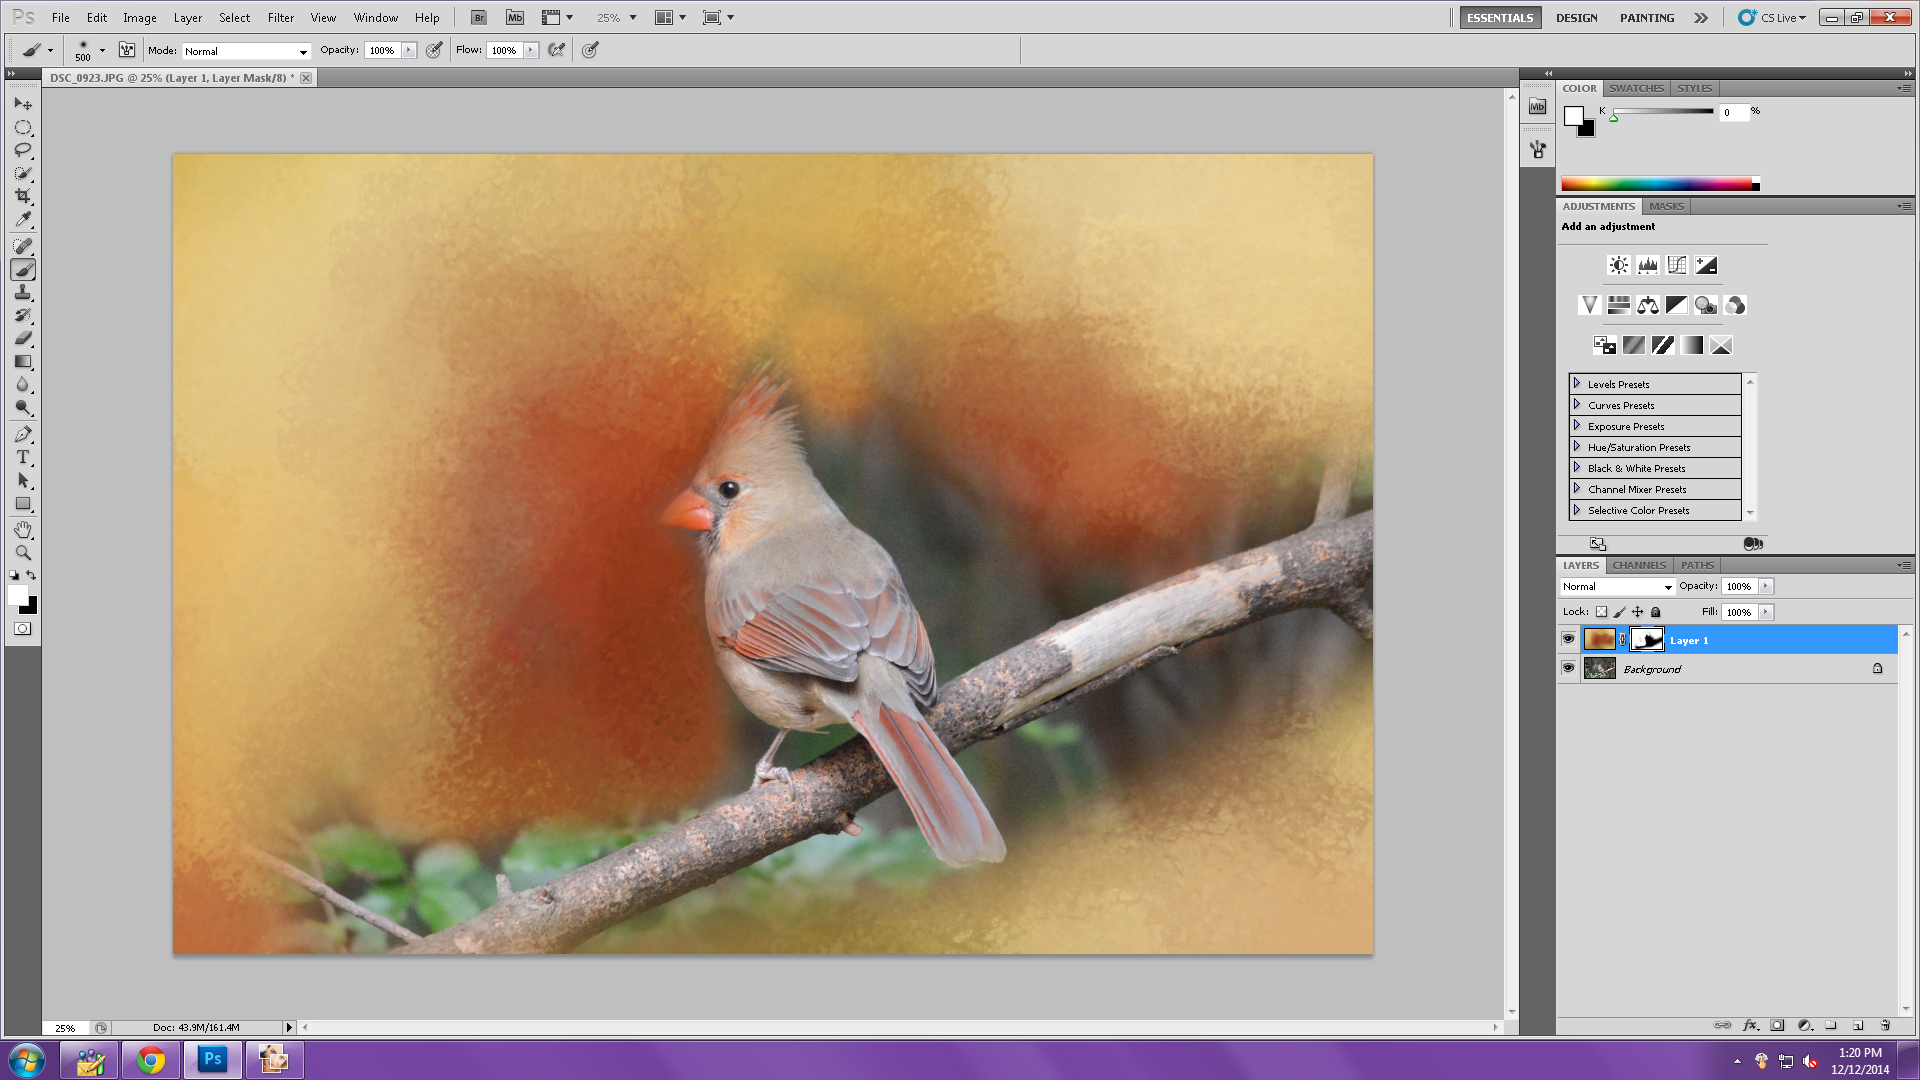
Now it's time to paint some of this texture back in, closer to the bird. I lowered the brush size, left opacity at 100% for now, but I flipped my foreground and background colors...now WHITE is in the foreground, which enables me to paint the texture back in around the bird. Notice I've gone over her beak...I'll show you how to fix that later. Don't worry too much about precision here. Anything you paint in by mistake, you can flip those paint colors and paint it right back out. Which I do often as I go along...paint in, paint out...and I'm changing my brush size as I go to fit into smaller spaces.
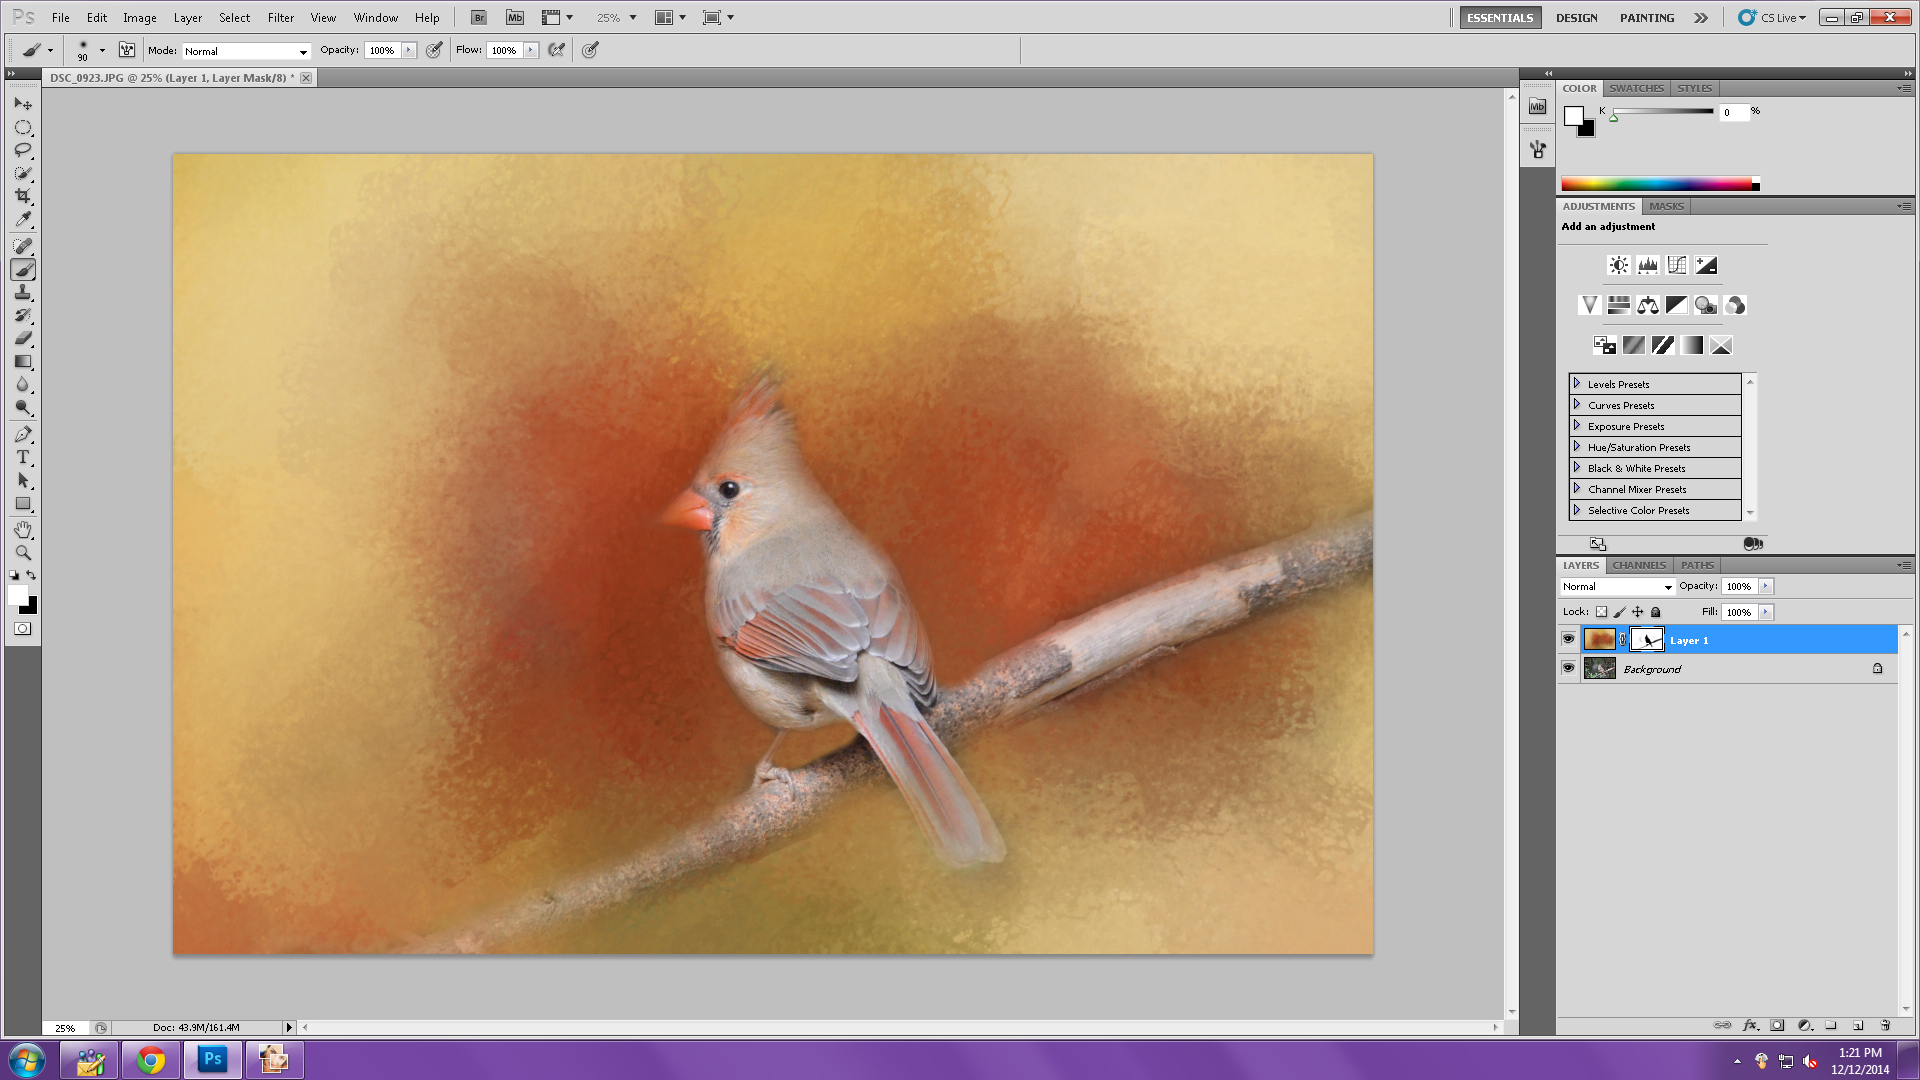
I have now painted everything back in closely around the bird and the branch, so it's time to refine things. This is where I'm at right now, and as you can see, there is too much texture over her beak and tail, as well as too much on the branch. So I will now switch back to black as the foreground color, lower the brush size and carefully get that excess texture off her beak, her foot and leg, and some of her head feathers.
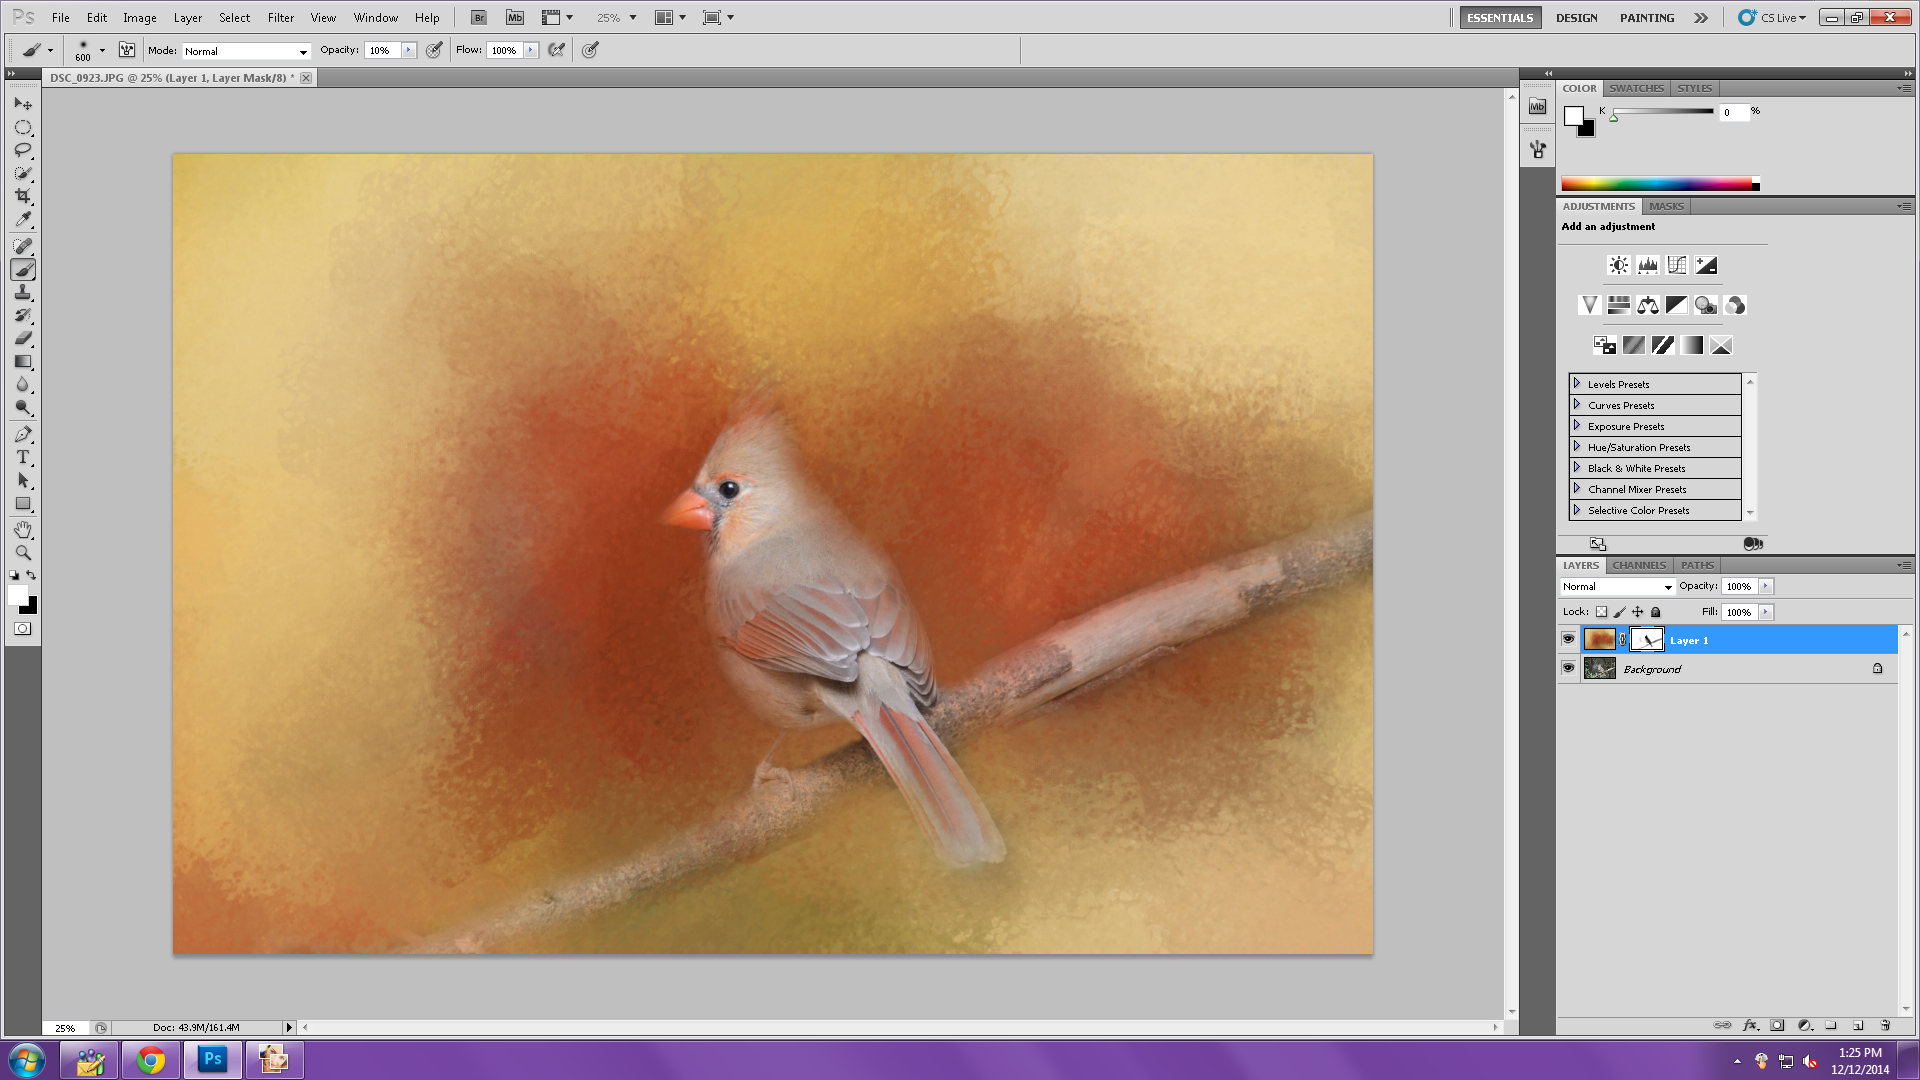
Here's the image now after removing the texture from the beak, leg, foot and some of the head feather area. Now I'm going to lower the opacity down to 10%, and I'm going to make the brush size larger and begin to paint the texture back over the edges of the bird. This low opacity will bring the texture into the bird and actually make the two look more a part of each other. I use gentle, sweeping motions with the pen on my tablet, and often will simply "tap" it in places rather than brush. Add a little here, add a little there, type of thing. :)

Here's where I am now, and as you can see, I did bring the texture back over the bird some, but I affected all the areas I fixed before. No problem!
Let's zoom in on this and take a closer look. I've lowered my brush size, adjusted the opacity to a little higher number, and changed once again to black as my foreground, so I can brush the texture off the areas I want to see better.
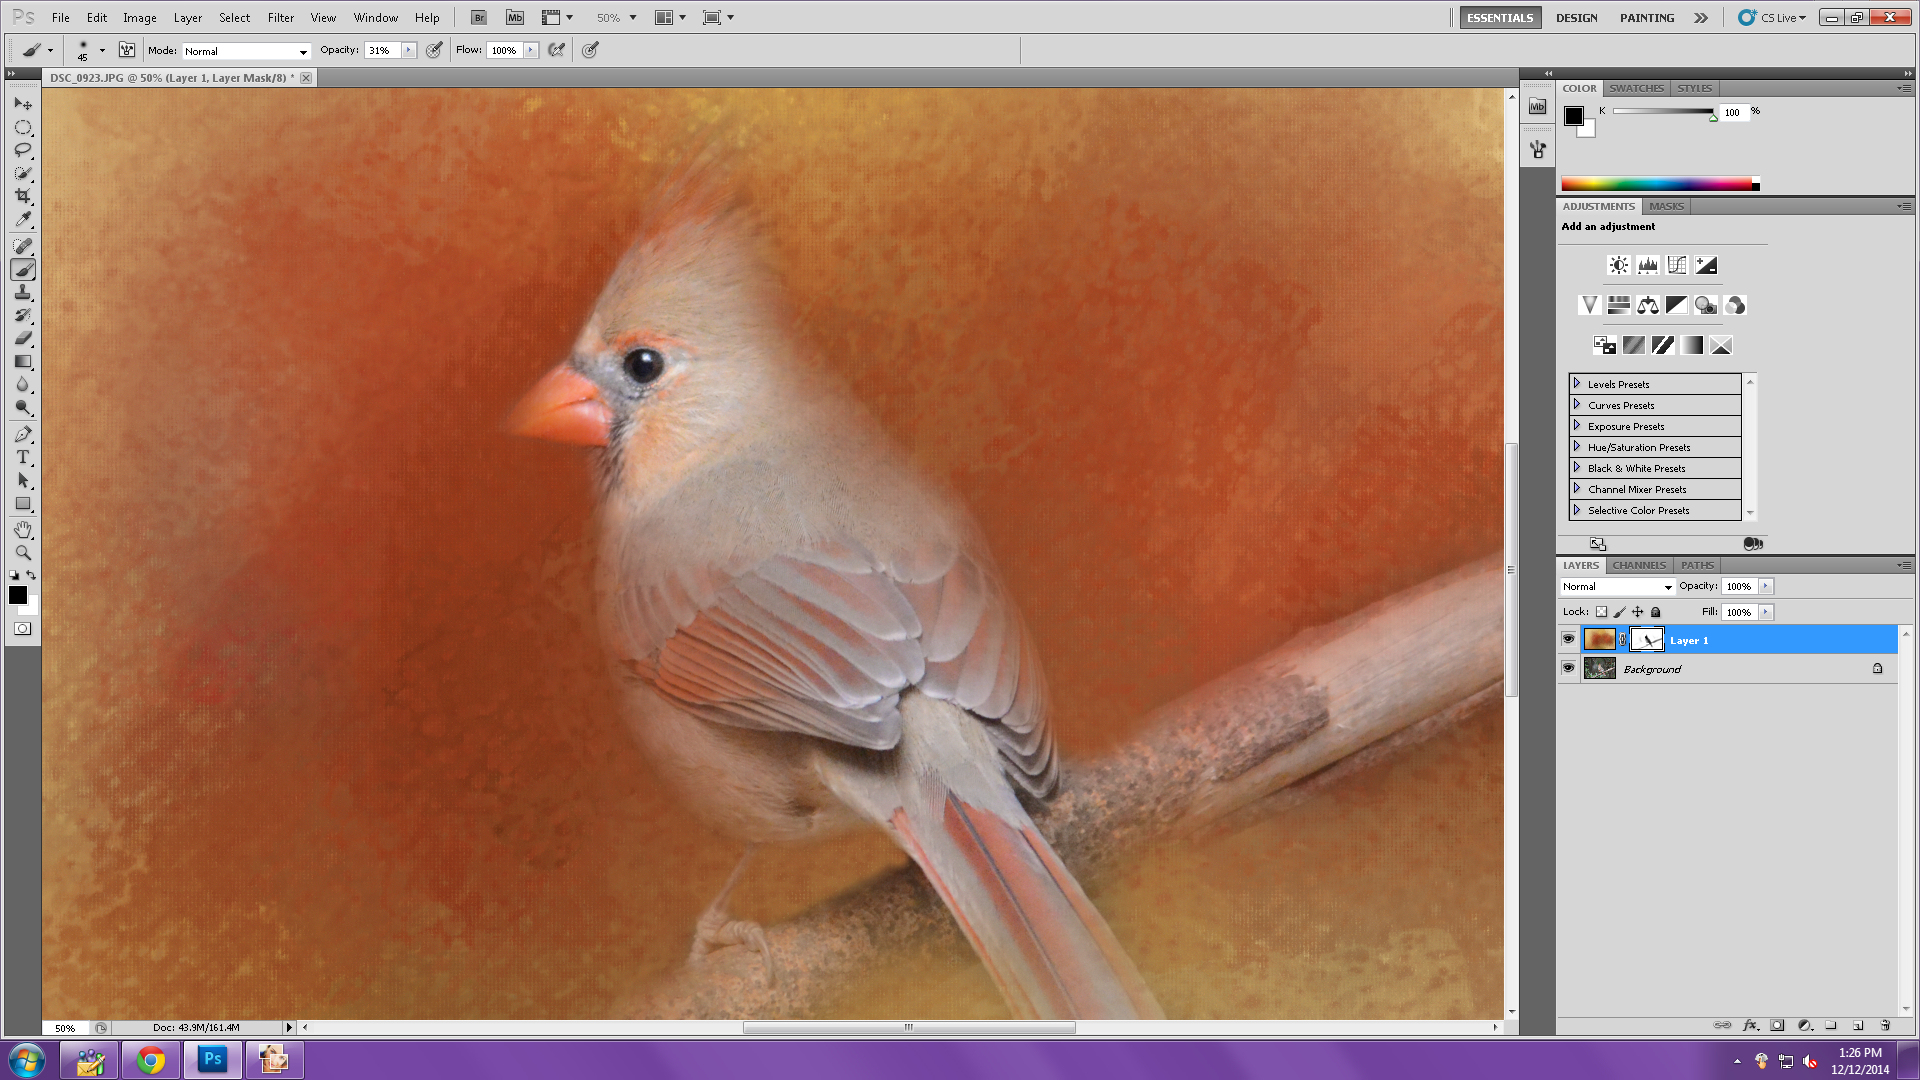
Her beak and head feathers look much better now. Once again, I'm back and forth on the black/white foreground/background colors -- painting out, painting in. It's actually very relaxing...much like real painting in my studio.

I removed more of the texture from her tail, foot and the branch. Then I went to a very soft opacity - 7% - and a larger brush to add and remove more areas of texture.

After a little more back and forth with the black/white and changing brush sizes, I changed opacity once more to 28% to brush some of the texture back over the foot and branch.
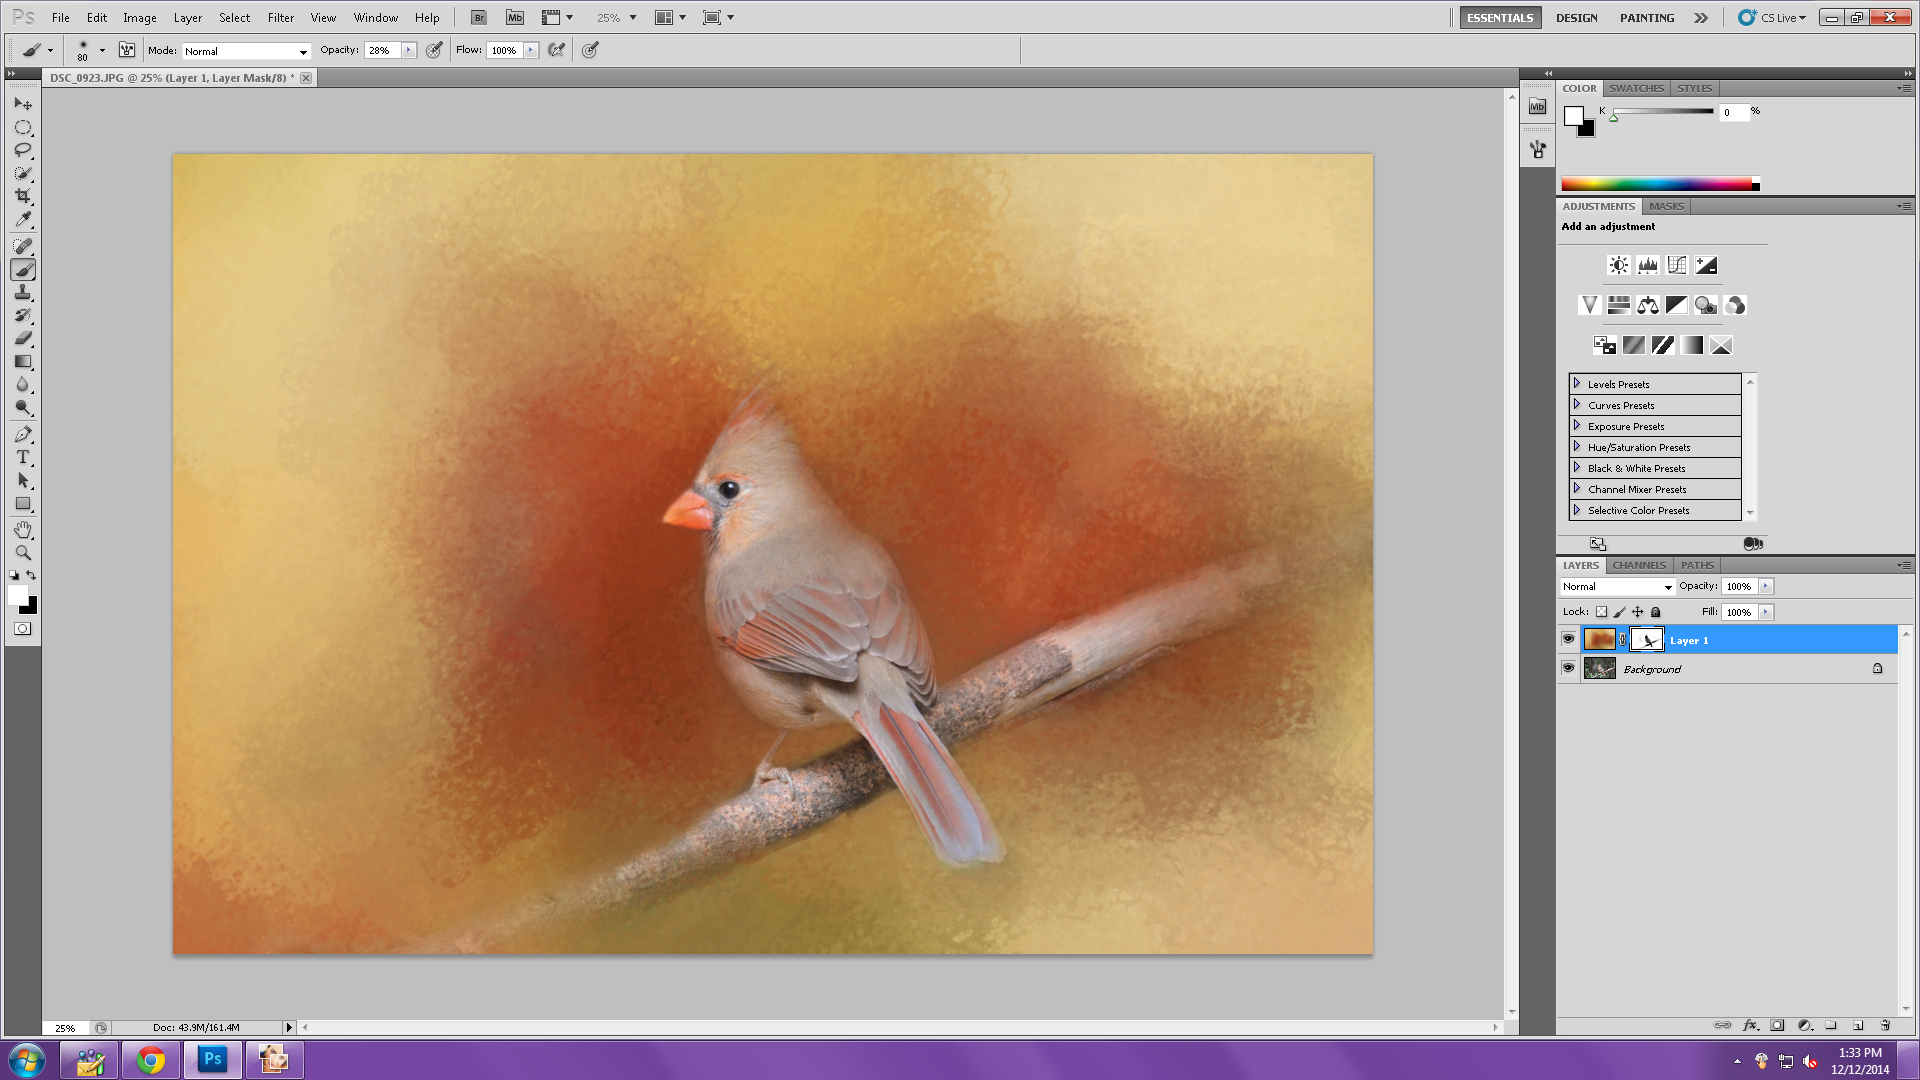
As you can see, by changing opacity of the brush, brush sizes, and from switching those foreground and background colors back and forth to be able to paint out the texture, then paint it in, then back out again, the texture ends up actually becoming a "paint", in essence, covering parts of your subject. Decide where you want the sharpest areas (usually beaks and eyes for me when it comes to birds), and mask the texture off fairly strongly in those areas. But masking the texture softly in over feather edges actually looks pretty nice. Same thing with fur. To me, it looks better if the bird or animal becomes one with the texture, rather than looking like it was placed on top of the texture. Too much hardness or very strong opacity can often make it look as if something is "pasted" on. Brush hardness AND opacity of the brush are both very key elements to making things blend nicely when doing masking.
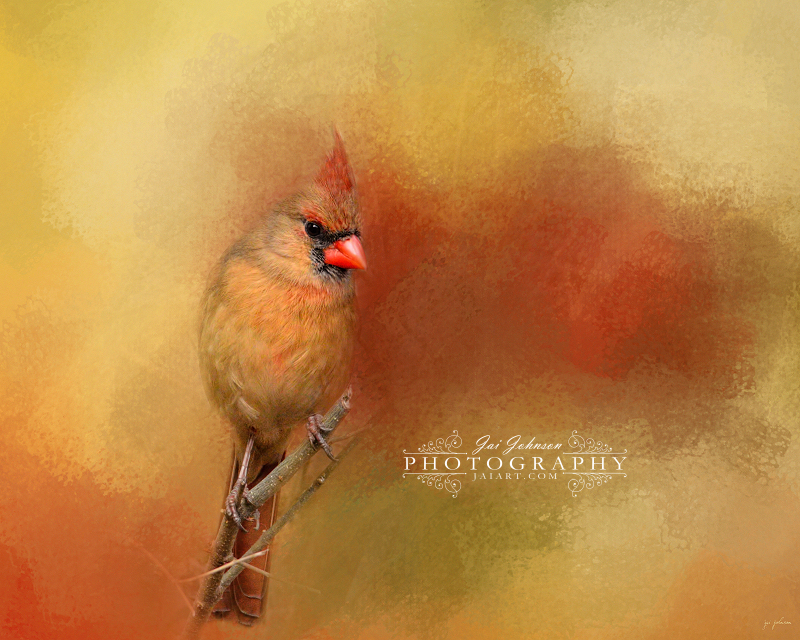
This ends the masking part of this, so I'm going to stop here. What I would do to continue on with the image would probably be to add the original texture back over this entire image and play with my layer modes. I tend to like multiply to darken or add drama, overlay to add brightness and saturation and soft light to just give a slight overall glow to a finished work. Here's an example similar to this of another Cardinal I finished today. This one is completely finished. I did add the entire texture over the image again (after masking) and chose the overlay layer mode at about 50% which boosted the saturation and brightness.
This ends the masking part of this, so I'm going to stop here. What I would do to continue on with the image would probably be to add the original texture back over this entire image and play with my layer modes. I tend to like multiply to darken or add drama, overlay to add brightness and saturation and soft light to just give a slight overall glow to a finished work. Here's an example similar to this of another Cardinal I finished today. This one is completely finished. I did add the entire texture over the image again (after masking) and chose the overlay layer mode at about 50% which boosted the saturation and brightness.
I hope some of you find this helpful in your work, and once again, I apologize for not being a photoshop expert. I know many people use the software regularly. I do have some tutorial links in the blog sidebar to some videos for photoshop users, if you'd like to check them out.
InJoy,
Jai
InJoy,
Jai
 RSS Feed